How to Partition Hard Drive Disk without Formatting
Why Need Partition Hard Drive
Disk partitioning is a process of dividing a hard drive into several partitions - managing the hard disk drive by shrinking, extending, deleting, creating partitions and change partition size, label, even location, etc. Why do we need to partition a hard drive? Here are the common reasons:- To make full use of hard drive space, splitting it into several partitions.
- Operating System update.
- The changes in computer and hard drive usage.
- The change of computer users needs.
But to partition a hard drive without formatting it is very important for some specific purposes. How to partition hard drive disk without formatting it? Here, both Disk Management and third-party partition manager software can work.
Solution 1: Partition hard drive without formatting using EaseUS partition manager
Professional partition manager software - EaseUS Partition Master can partition a hard drive with its advanced partition operations on your hard drive without formatting it, including resize and move partitions, convert partition, split partition, merge partitions, resize dynamic disk, etc.Moreover, EaseUS Partition Master can extend or resize partition when there is no unallocated space behind it that Disk Management can't.
See how to partition a hard drive without formatting with EaseUS Partition Master on your own:
Step 1. Create unallocated space.
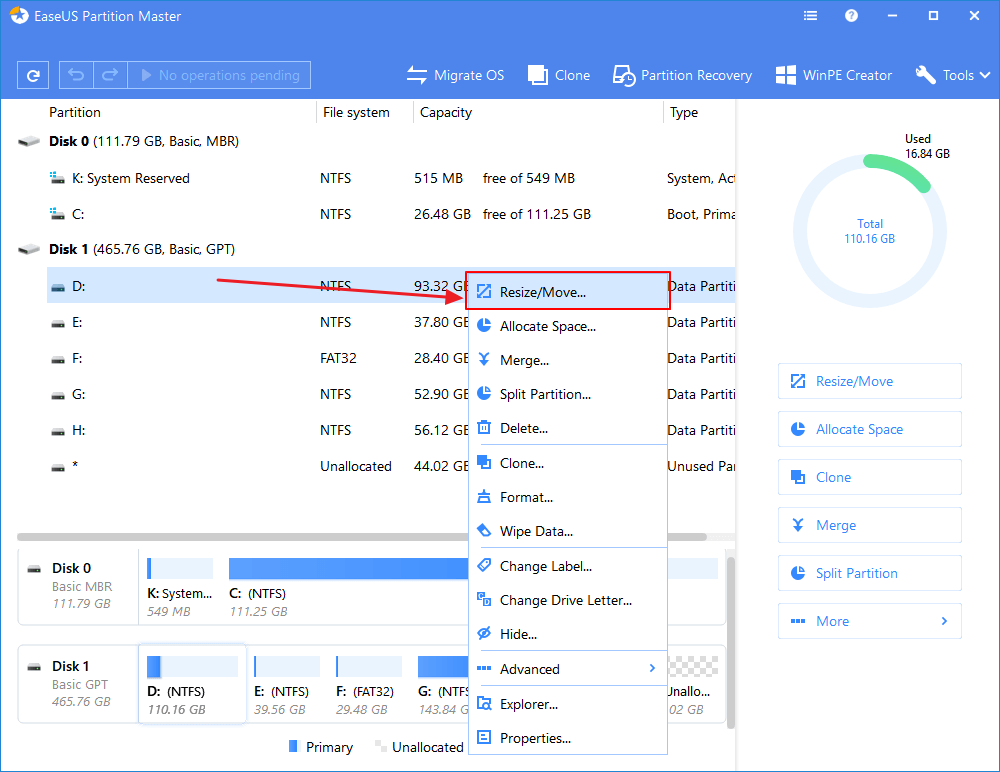
Install and launch EaseUS Partition Master. Right-click on a partition and select "Resize/Move" to get unallocated space. Drag the end of the partition to leave unallocated space.
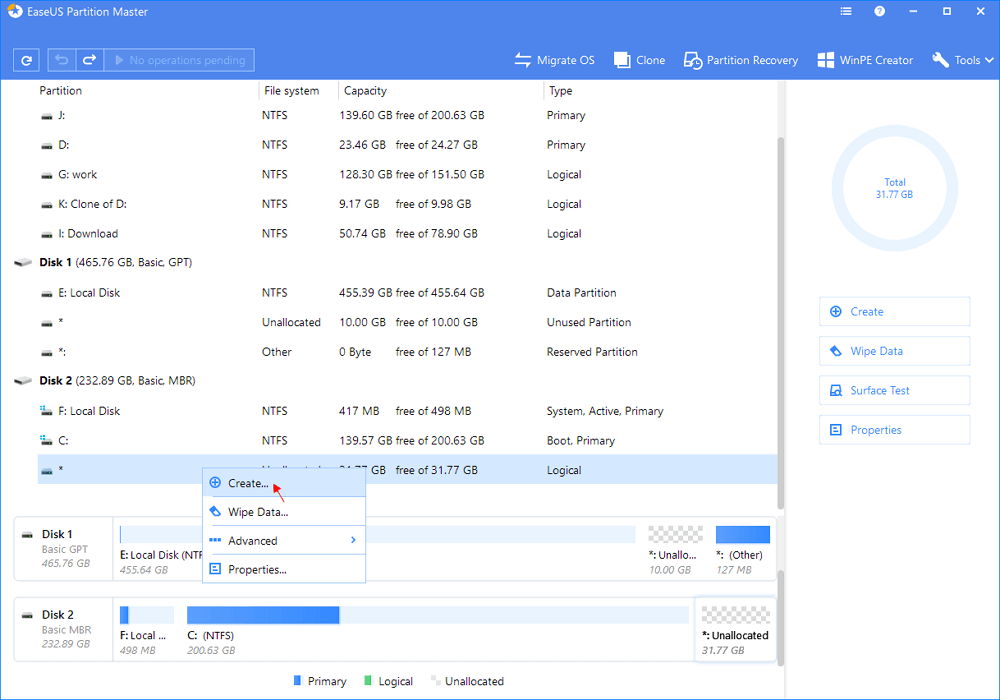
Once you have got unallocated space, you can create a partition. On the main window, right-click on the unallocated space on your hard drive or external storage device and select "Create". Set the partition size, partition label, drive letter, file system, etc. for the new partition and click "OK" to continue.
Click the "Execute Operation" button at the top corner and keep all changes by clicking "Apply".

- Extend or resize system partition
- Recover lost or deleted partition
- Convert MBR to GPT or GPT to MBR
- Migrate OS to SSD/HDD
- Optimize SSD/HDD performance
Solution 2: Partition hard drive with Disk Management
Before you start partition hard drive with Disk Management, you should first understand that it has different features in different Windows OS.- In Windows 10/8/7, Vista and Windows Server 2008, Disk Management can shrink volume, extend volume, shrink volume, create volume, delete the volume, format volume, etc. on a hard drive.
- In Windows 2000/XP and Windows Server 2003, Disk Management can only create a partition, delete partition, format partition, change the drive letter on a hard drive.
- Step 1: Open Disk Management
- Right-click on This PC/My Computer > Click "Manage" > Enter Device Manager and click "Disk Management".
- Step 2: Partition hard drive
- Shrink partition:
- 1. Right-click on the partition that you want to shrink and select "Shrink Volume".
2. Adjust the partition size and "Shrink" to confirm. 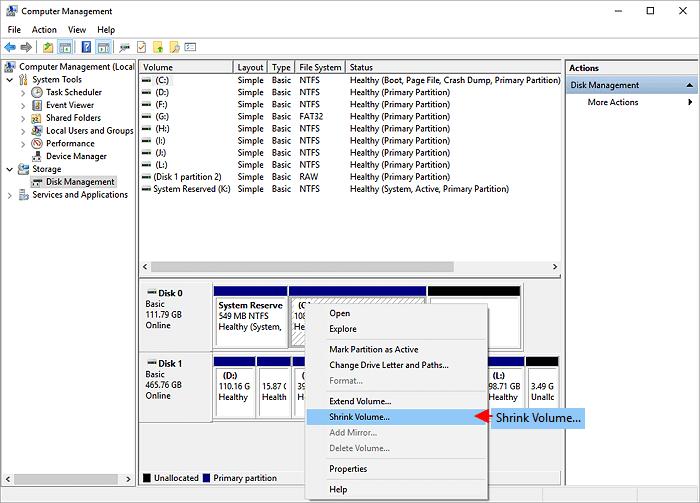
- Extend partition:
- 1. Shrink partition next to the target partition that you want to extend in advance.
2. Right-click on the target partition and select "Extend Volume". 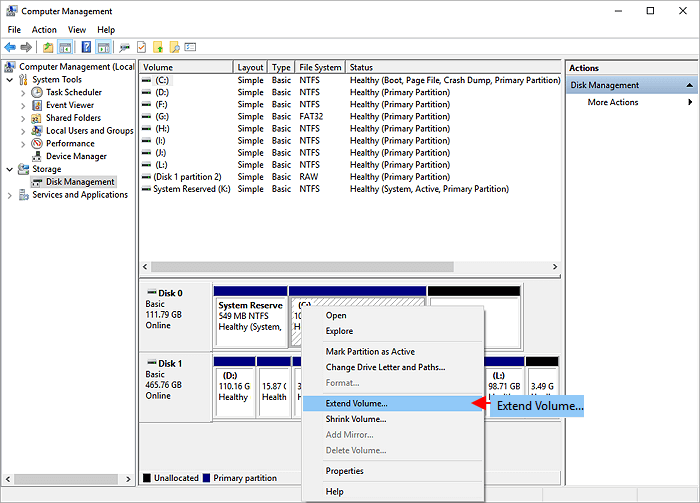
- 3. Click "Next" to continue, add the unallocated space to extend the target partition. Click "Next" and "Finish" to complete.
- Create partition: (formatting required)
- 1. Right-click on the unallocated space, select "New Simple Volume".
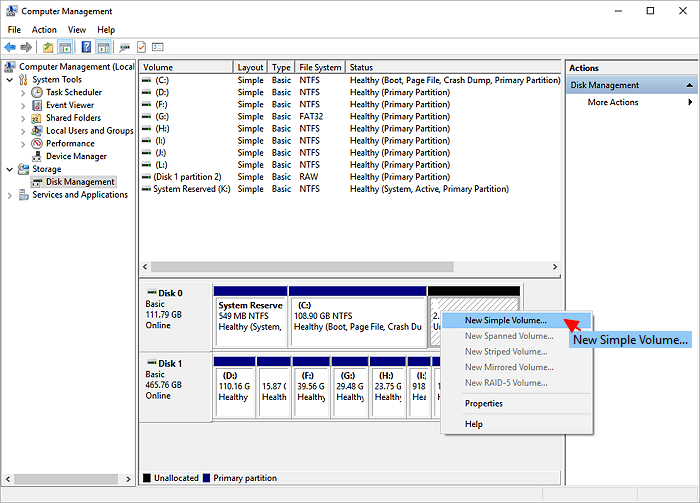
- 2. Click "Next" to continue, set the new partition size, drive letter, file system, click "Finish".
Wait for the formatting complete. - Delete partition:
- Right-click on the partition that you want to delete, select "Delete Volume" and select "Yes".
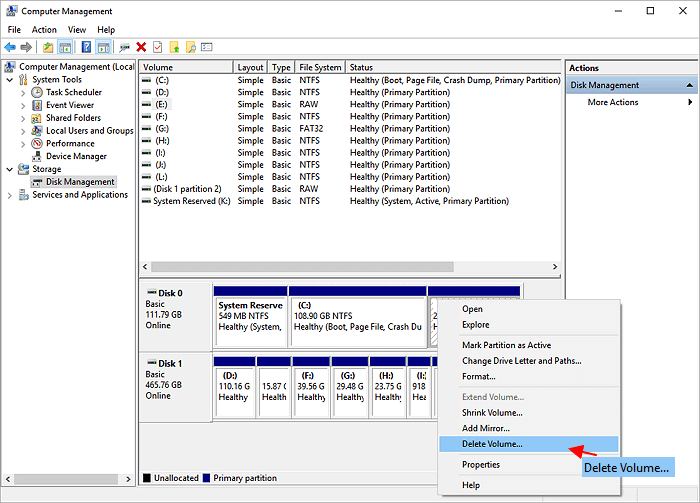
- Change drive letter:
- 1. Right-click on the partition and select "Change Drive Letter and Paths".
2. Click "Change" to set a new drive letter for your partition. 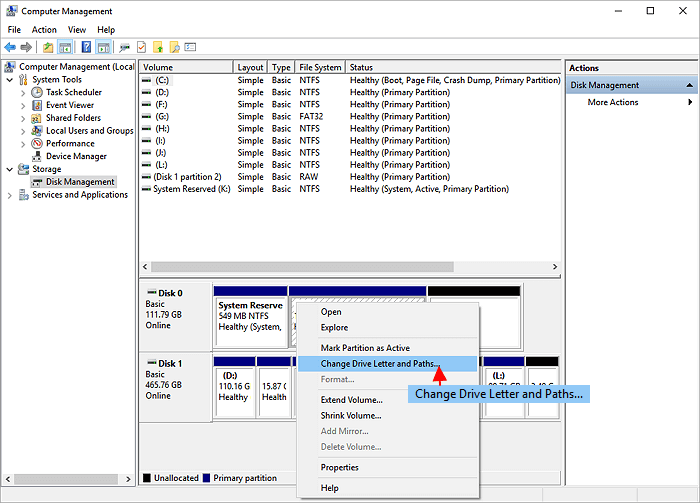
- It can't re-partition hard drive especially create a new partition without formatting.
- It can't extend system partition when the unallocated space is not behind the system partition.
- It has no "Move Partition" feature to move the unallocated space next to the volume which you want to extend.
- It can't convert disk to MBR/GPT.
- It can't convert Dynamic disk to Basic disk.
In all situations, a third party partition manager software is highly required since Disk Management has so many limitations when partitioning a hard drive. EaseUS Partition Master can always be your best choice.
Comments
Post a Comment